


I am so excited to be sharing this post with you all today! The challenge over at Top Tip Tuesday this week is "Material Girl" and Samantha contacted me a month or so ago and asked if I would do a special guest tutorial for her specifically for this challenge - ABSOLUTELY! I was so honored that she asked me.....She asked if I would do a tutorial on "Coloring and Shading with Copics.
"For the "Material Girl" part of the challenge, you can use jute, felt, denim, cotton, or read into the actual title of the challenge...
I am not a certified Copic "colorer" or anything - just to set that straight right from the get-go! LOL...I am just a girl who loves to muck with coloring - I find it very relaxing and therapeutic and I spend a lot of time watching You Tube videos and tutorials watching how the PRO's do it ;)
I am using a new-to-me image from Your Next Stamp called Isabel and my sentiment is from Papertrey Ink. I always stamp (or print out if it's digi) onto X-Press It Blending Cardstock if I'm going to be coloring with Copic markers....let's get started:

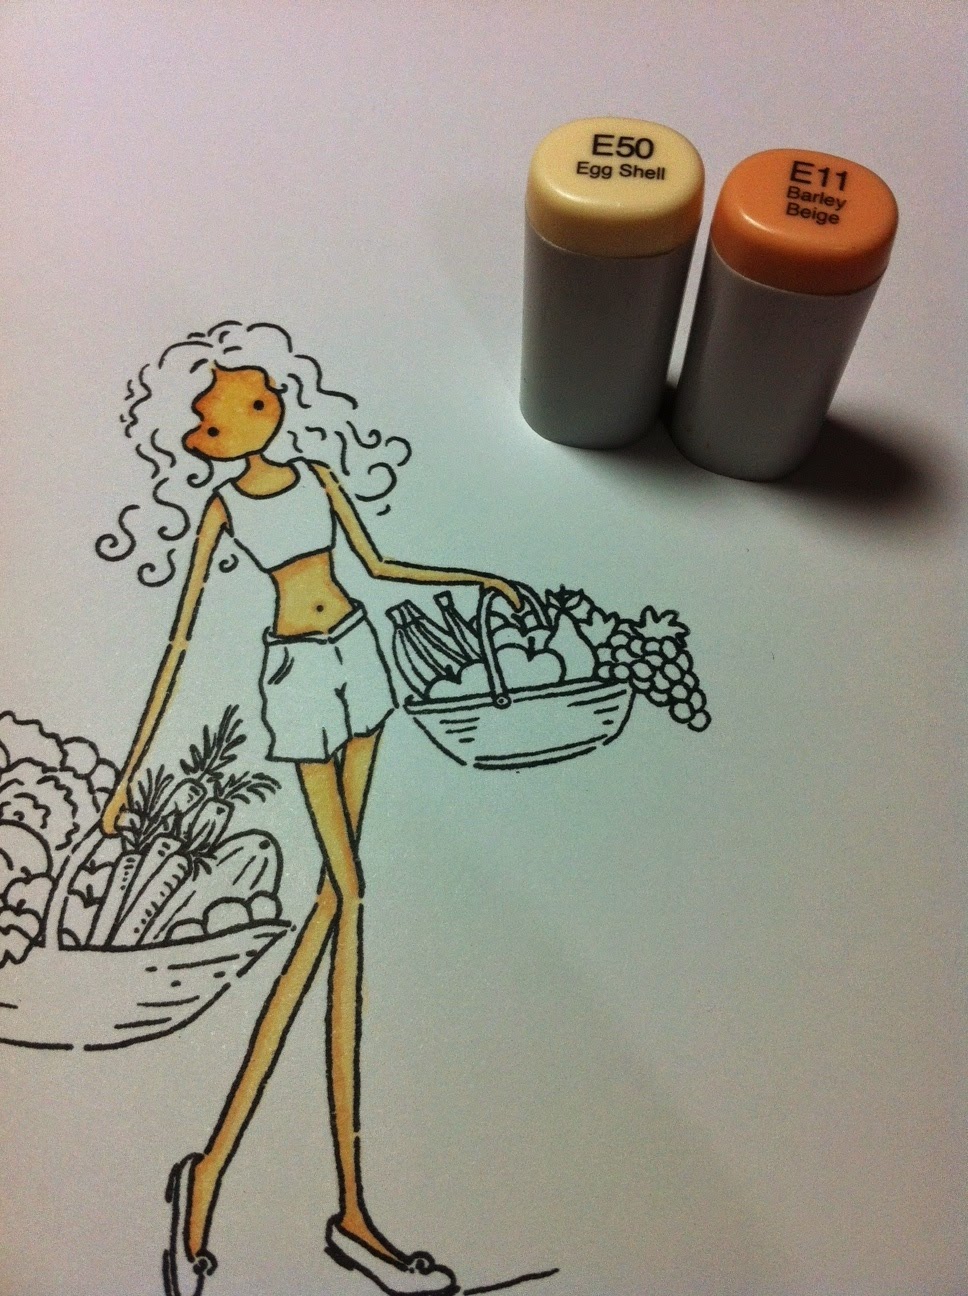
For skin, my go-to colors are E50 for the base and E11 and E13 for shading. I color in my whole skin area with E50, then I use E11 first to find my shadows and color those in:

...then, I blend the 2 together with my E50 again.
Here, I have added my E13 for a bit darker depth (you don't need a lot for an added punch!!) - then blend once more with E50:


For the hair, I went with color combo E35, E37 and E57....adding the lightest color first, I leave white areas for the "light" and then add darker colors to the darker areas of her hair (by the neck, the curls, the top of her head for her streaks)


Once I add all my colors for the hair, I go back and blend with "flicking motions" to create the look of natural streaks and light source areas...I still need A LOT of practice with hair - to me, it's the most difficult area of an image to color with Copics:

For the rest of the image, I didn't take as many pictures as you probably get the idea of how I color...add the lightest color first, add the next darker color and go back and blend with the first - as you can see in the example of the baskets:

Here is the final product:

For my "material" part of the challenge, I cut out flowers from yellow felt and added more gumdrops to the centers for a pop of color! :) Be sure to hop on over to the TTT Challenge blog to see what the other uber-talented DT have in store for you!!
Thank you so much, Samantha, for having me today!! I have never done a tutorial before so you've helped me step out of my comfort zone girlie! I am so honored to be featured on Top Tip Tuesday today. Hugs!
Great job, nicely done tutorial. Awesome coloring and the flowers are pure gorgeous. Nice Card friend! Hugs!
ReplyDeleteWhat a delightful image and you've colored her beautifully! Thanks for sharing your technique!
ReplyDeleteFantastic tutorial! Beautifully colored image and those flowers rock!
ReplyDeleteHugs- Tina